My Home WebServer project
How I repurposed an old PC collecting dust to create a powerful home web server using Linux, Proxmox and Apache.
Project Details
This project involved taking an old desktop computer and installing Proxmox VE as the base operating system. Proxmox allows for easy management of virtual machines and containers, making it ideal for a home server setup.
Once Proxmox was installed, I created a Linux virtual machine to host the Apache web server. Apache is a robust and widely-used web server software that can handle multiple websites and applications.
With the server up and running, I configured it to host several personal projects, including a media server, a file sharing service, and a personal blog. I also set up remote access so I can manage the server from anywhere.
This home server project has been a great learning experience in Linux administration, virtualization, and web hosting. It has also provided me with a reliable platform to experiment with new technologies and services.
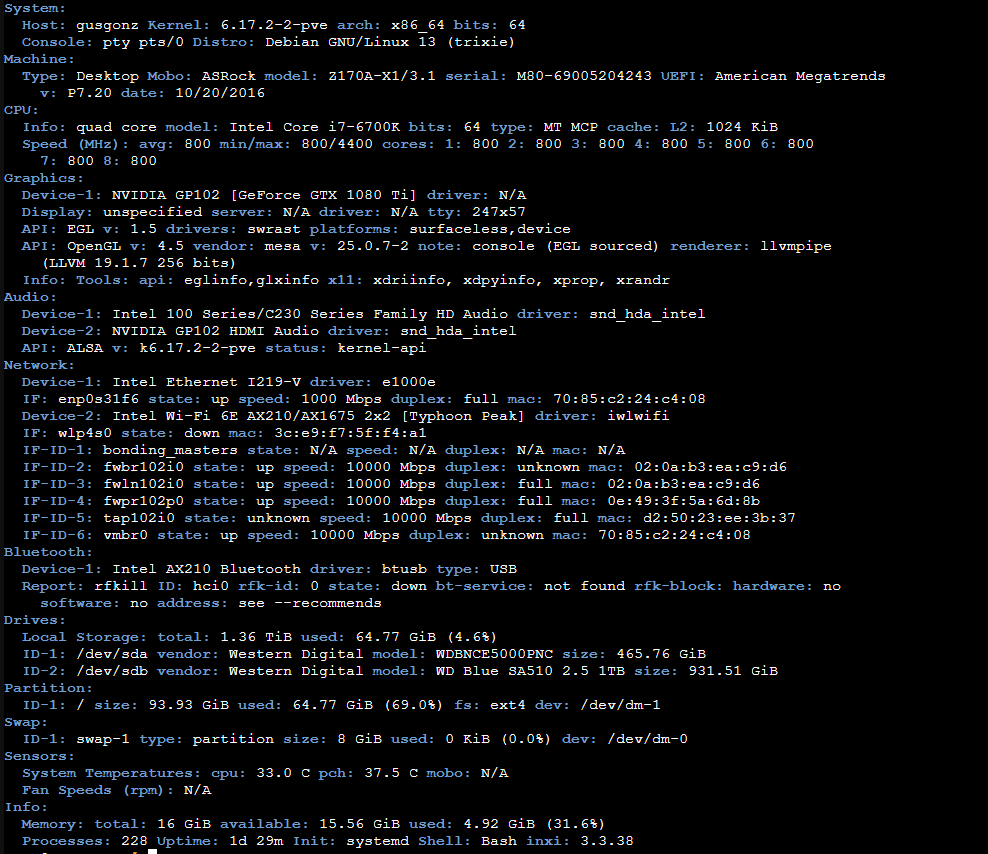
My Recycled PC Specifications
- Processor: Intel Core i7-6700K
- Memory: 16 GB DDR4 RAM
- Storage: 1 TB SSD + 550 GB SSD
- Graphics: NVIDIA GeForce GTX 1080 Ti
- Power Supply: 650W Modular PSU
Took my old computer out of the closet wiped it clean... Now What?
I decided to use Proxmox VE as a virtualization platform. It would allow me to run multiple virtual machines on a single physical server, which would be perfect to scale up from just a web server to a full-fledged home server with multiple services.
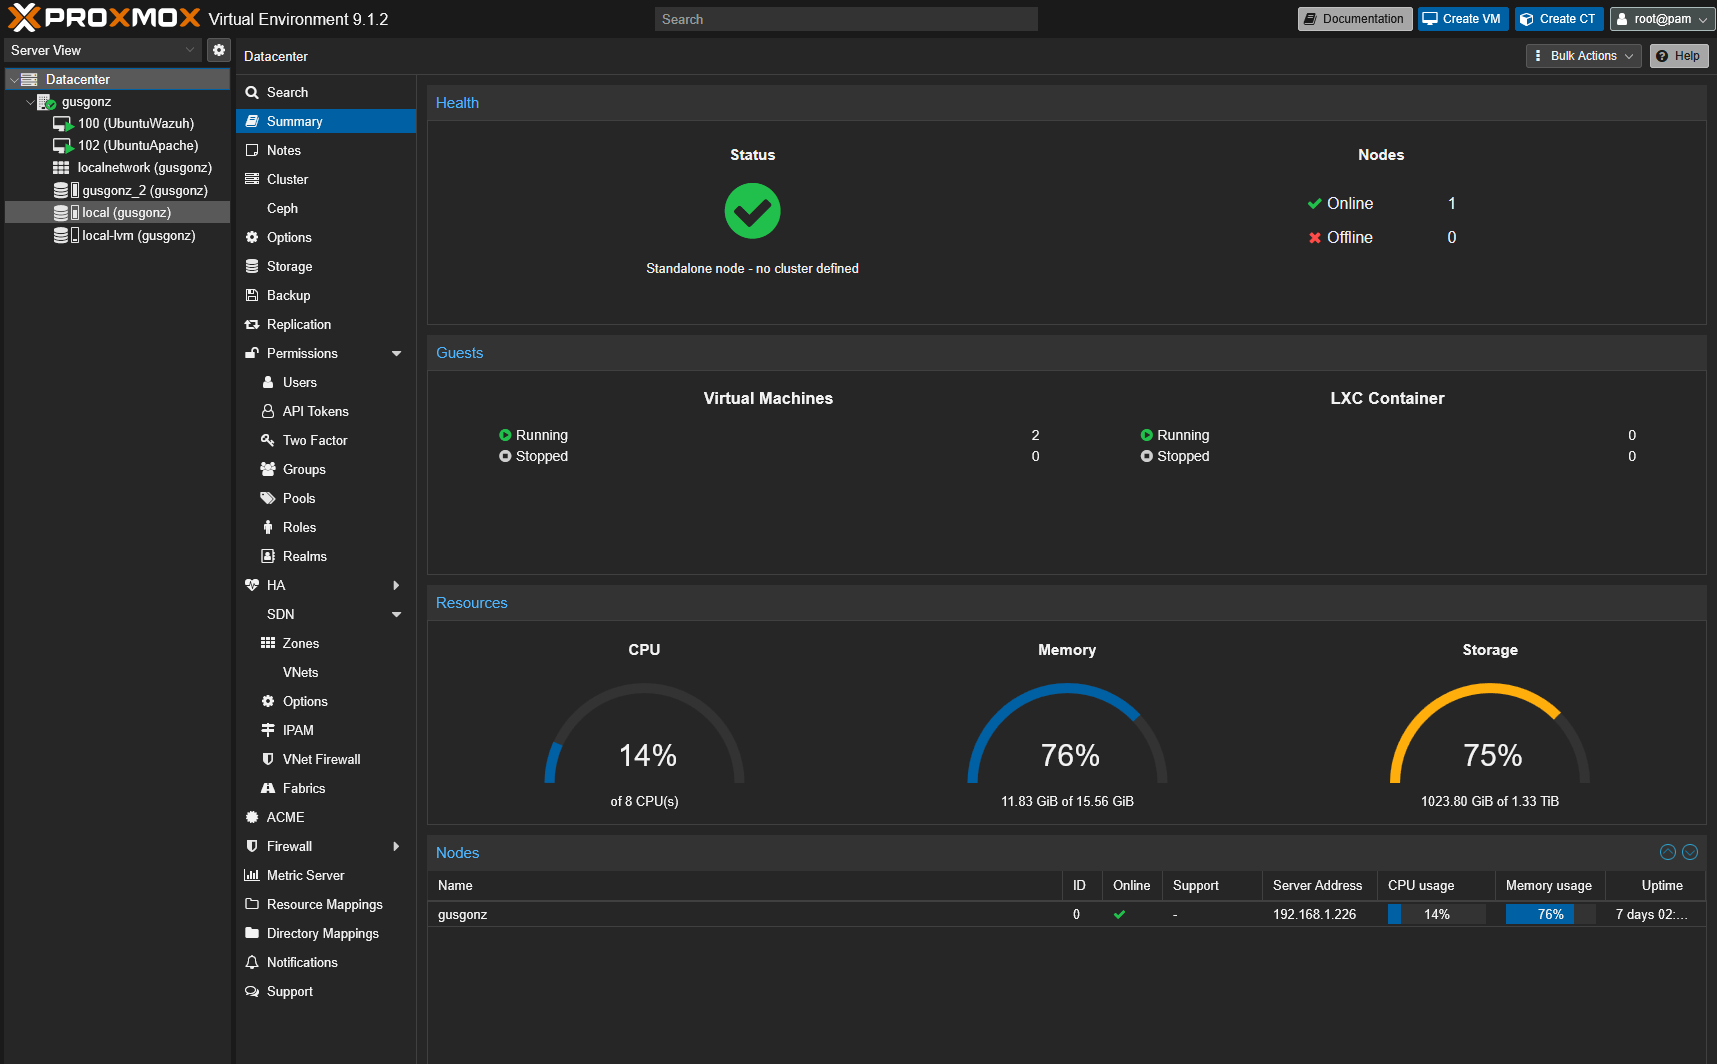
After installing Proxmox, I created a Linux virtual machine to host the Apache web server. Apache is a reliable and widely-used web server software that can handle multiple websites and applications. The freedom to be able to install multiple virtual machines and Lighter containers (LXCs) is what attracted me to the service. I know the computer I'm using is extremely underpowered but I felt this would give me a good stepping stone into a bigger and better home lab down the road. Especially as I will slowly upscale the hardware in time.
The beauty of Proxmox as well is that is meant to be remotely managed. So I can easily log into my server from my main computer. *Attention* Make sure you read the documentation carefully, because you will need to setup your firewalls correctly. For your security and also to avoid locking yourself out!
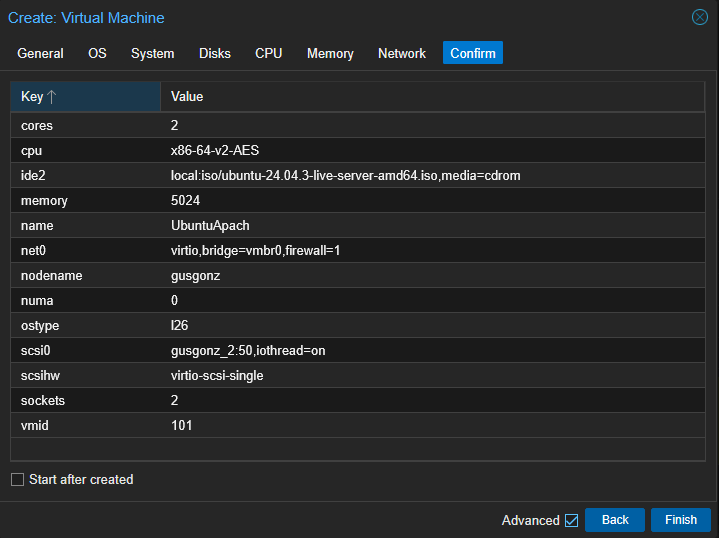
Setting up a Ubuntu server Virtual Machine
Once I had Proxmox up and running, I created a new virtual machine and installed Ubuntu Server as the operating system. Ubuntu is a popular choice for servers due to its stability, security, and extensive community support. The Proxmox dashboard made the VM creation process straightforward.
After the installation I configured firewall rules in Proxmox for security and set up SSH access for remote management. This allowed me to easily connect to the server from my main computer and perform administrative tasks. From there the Apache web server
installation was fairly simple. Just a matter of updating and upgrading my apt repositories with the following command:  Then ready to install the Apache web server, with the following
command:
Then ready to install the Apache web server, with the following
command: 
With Apache installed, I took care of securing the server by creating Cloudflare tunnels to avoid exposing my home IP address to the public internet. This added an extra layer of security and ensured that all traffic to my web server was encrypted. These tunnels allow me to keep my ports closed on my network while still allowing access to my web server.