n8n Workflow Automation on My Home Server
How I installed and configured n8n on my home server to automate workflows and integrate various services at n8n.gusgonz.com
What is n8n?
n8n is a powerful, open-source workflow automation tool that allows you to connect different services and automate tasks. Think of it as a self-hosted alternative to Zapier or Make (formerly Integromat). With n8n, you can create complex automation workflows using a visual interface, making it perfect for both technical and non-technical users.
The beauty of n8n is that it's completely self-hosted, giving you full control over your data and automations. This aligns perfectly with my home lab philosophy of maintaining privacy and control over my infrastructure.
Why Run n8n on a Home Server?
Running n8n on my home server provides several advantages:
- Privacy: All automation workflows and data stay within my network
- Cost-effective: No monthly subscription fees for automation services
- Unlimited workflows: No restrictions on the number of automations I can create
- Learning opportunity: Hands-on experience with workflow automation and self-hosting
- Integration with local services: Can easily connect to other services running on my home lab
Installation Prerequisites
Before installing n8n, I ensured my home server met the following requirements:
- Proxmox VE installed and running (covered in my home server project)
- Ubuntu Server VM with at least 2GB RAM allocated
- Node.js version 18.x or higher
- Docker and Docker Compose (for containerized deployment)
- Domain name configured (n8n.gusgonz.com)
- Cloudflare tunnels setup for secure external access
Installation Method: Docker Compose
I chose to install n8n using Docker Compose because it provides the easiest deployment and management experience. Docker ensures n8n runs in an isolated environment with all dependencies included, making updates and troubleshooting much simpler.
Step 1: Install Docker and Docker Compose
First, I installed Docker on my Ubuntu Server VM. This process is straightforward using the official Docker installation script:
sudo apt update && sudo apt upgrade -y
curl -fsSL https://get.docker.com -o get-docker.sh
sudo sh get-docker.sh
sudo usermod -aG docker $USER
After installation, I verified Docker was working correctly with docker --version and docker compose version.
Step 2: Create Docker Compose Configuration
I created a dedicated directory for n8n and set up a docker-compose.yml file to define the n8n service:
mkdir -p ~/n8n && cd ~/n8n
The docker-compose.yml file contains the n8n container configuration, including volume mappings for persistent data, environment variables for configuration, and network settings. I configured n8n to use a PostgreSQL database for better performance and reliability compared to the default SQLite.
Step 3: Configure Environment Variables
I created a .env file to store sensitive configuration like:
- Database credentials
- n8n webhook URL (https://n8n.gusgonz.com)
- Encryption key for credential security
- Timezone settings
- User authentication settings
Step 4: Launch n8n
With everything configured, I launched n8n using Docker Compose:
docker compose up -d
The -d flag runs the containers in detached mode, allowing them to run in the background. I monitored the initial startup using docker compose logs -f to ensure everything started correctly.
Securing n8n with Cloudflare Tunnels
Instead of exposing n8n directly to the internet, I used Cloudflare tunnels to provide secure access. This approach offers several benefits:
- No need to open ports on my home network
- Free SSL/TLS encryption
- DDoS protection from Cloudflare
- Hides my home IP address
- Easy to manage access rules
I configured a Cloudflare tunnel to route traffic from n8n.gusgonz.com to my local n8n instance running on port 5678. The tunnel creates a secure outbound connection from my server to Cloudflare's network, eliminating the need for port forwarding.
Initial Setup and Configuration
After accessing n8n at https://n8n.gusgonz.com, I completed the initial setup:
- Created the admin account with a strong password
- Configured email settings for workflow notifications
- Set up webhook endpoints for external integrations
- Installed community nodes for additional service integrations
- Configured automatic backups of workflow data
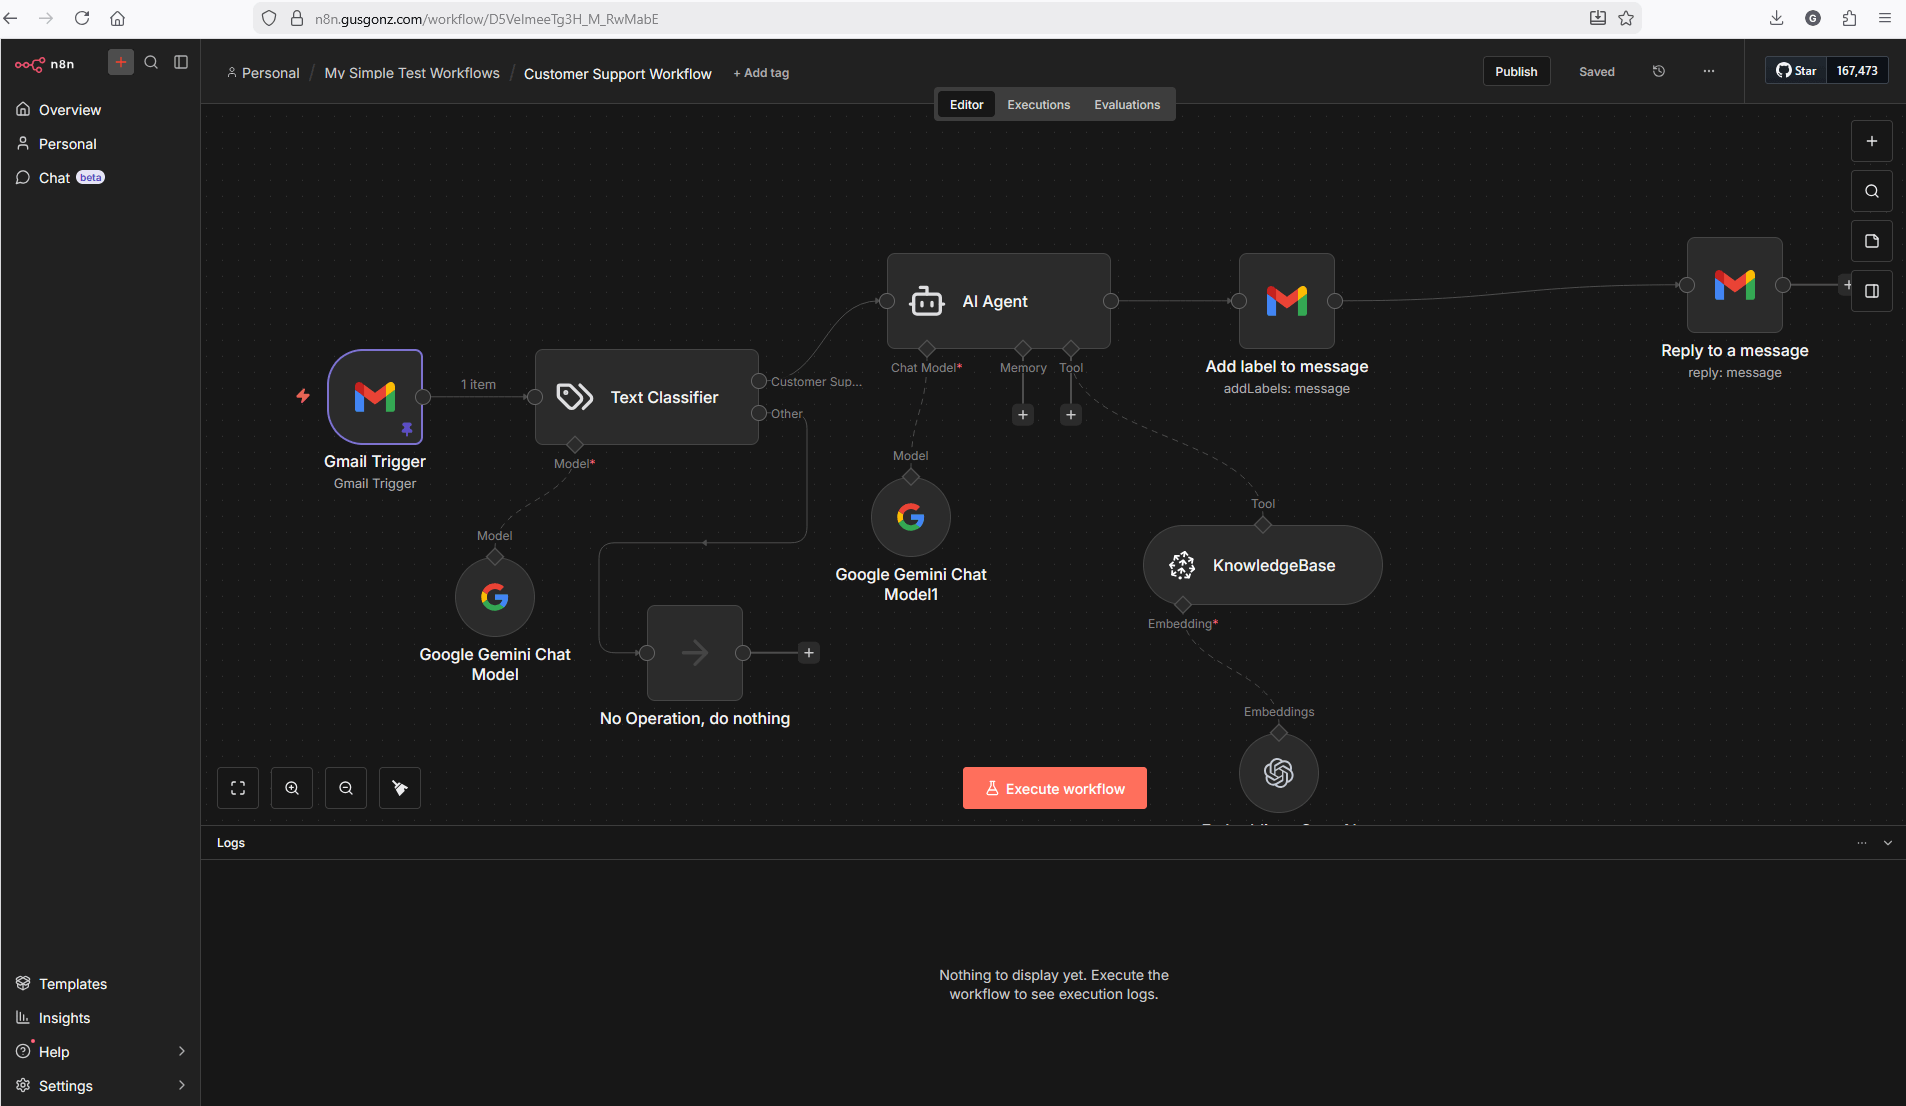
Example Workflows I've Created
Since setting up n8n, I've created several useful automations:
- Home Lab Monitoring: Workflows that monitor my server health and send alerts to my phone when issues are detected
- Social Media Automation: Automatically share blog posts across multiple platforms
- Data Backup Automation: Schedule and verify backups of important data from various services
- API Integrations: Connect different services in my home lab to create seamless data flows
- RSS to Discord: Monitor RSS feeds and post updates to Discord channels
Maintenance and Updates
Keeping n8n updated is simple with Docker Compose. I pull the latest image and recreate the container:
cd ~/n8n
docker compose pull
docker compose up -d
Docker Compose automatically handles the update process while preserving my workflows and data stored in the persistent volumes.
Performance and Resource Usage
n8n runs efficiently on my home server, typically using:
- CPU: 5-10% during idle, spikes during workflow execution
- RAM: Approximately 300-500MB depending on active workflows
- Storage: About 2GB including Docker images and workflow data
The containerized deployment ensures n8n doesn't interfere with other services running on my server.
Lessons Learned
Through this project, I learned:
- The importance of using PostgreSQL over SQLite for production n8n deployments
- How to properly configure webhook endpoints for external service integrations
- Best practices for securing automation tools exposed to the internet
- The power of self-hosted automation tools for home lab management
- Docker Compose simplifies deployment and updates significantly
Future Enhancements
I plan to expand my n8n setup with:
- Integration with my Wazuh SIEM for automated security responses
- More complex multi-step workflows for home automation
- Custom nodes for specialized integrations
- Automated testing workflows for my other projects
- Integration with IoT devices in my home lab
Conclusion
Installing n8n on my home server has been incredibly rewarding. It provides powerful automation capabilities while maintaining the privacy and control that comes with self-hosting. The combination of Docker, Cloudflare tunnels, and Proxmox creates a robust, secure, and maintainable deployment.
If you're running a home lab and looking to add workflow automation, I highly recommend giving n8n a try. The learning curve is gentle, the community is helpful, and the possibilities for automation are virtually endless.